Coloring Technique Sharing


Levi-chan wrote:Whoa, Bluebug. That is so freakin awesome! I wanna bear your children now!
How did you do the hair, B? And the lips! And the shading! And everything! Just...wow.
-L
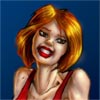
By comparison, the lips were pretty simple. For the upper lip, I used a darker color, and for the lower lip I used a lighter color. Then I added a highlight to the bottom lip.
To be honest (and hopefully this doesn't make me sound all uppity), I'm not too happy with her hair. It's a bit too messy and kinda flat looking for my liking. I wanted to do this with her hair ...

... which is an old image I did this year, but I was in the zone or something cuz it turned out much better ^^;; I hate it when my art actually regresses!


Aww, thanks, William G. I must say I really enjoyed coloring your sample. I'm still working on getting nice clean art and backgrounds like that. (Lately it only seems to work when I do flashbacks to the 20s for some reason.) Feel free to show us what you've been doing, anyway. I really like seeing other artists doing stuff with my work. And here's another for anybody that wants to play with it. I just resized it so it might be easier to get something out of it -


-
Taiwanimation

- Cartoon Hero
- Posts: 1078
- Joined: Fri Jan 01, 1999 4:00 pm
- Location: Fremont, CA
- Contact:


In answer to your question Levi-chan, I'll just quote myself:
 Hope the answer helps this time.
Hey ... you asked this question before!bluebug wrote:As for ambient lighting, I think of it as emanating from the floor .. and then I wing it from there
LAGtheNoggin did the best job on ambient lighting/back lighting in this thread so far.
You'll notice the lighting hits the underside of every body surface. I tend to make my backlighting more graduated, so the effect isn't as dramatic. It depends on the effect you're going for.
Oddly, the thing I'm most proud of in this picture is that little cloud in the top left hand corner. It's so perfectly ... cloudlike. And gotta love the fire. You have to do more fanart of Colonel Mustang, Soap (nudge nudge)
So yeah, sorry Levi-chan, but I'm marrying Mustang. Unless you're a dog-loving pyro ... Mmm. Fire.

My guess is that it gives you your progress towards the next level in the forum (ie. it gives an estimate of how many more posts you need to move from say, "forum lurker" to "forum denizen".Eunice P wrote:Awesome work, BB. I wish I had the time to do coloring practice. >>;
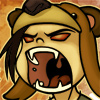
Uh? What's this strange bar thing on top of my avie?
Well, I basically use the same principles whether coloring hair, skin or clothing. I think of the light source as coming from the floor. The only "trick" with hair isn't really a trick at all. Just like everything else, the ambient lighting must follow the contours/textures of the shape. So for example, for skin, the lighting would be smooth and slightly rounded. For clothes, the lighting would be a bit straighter. For hair, the lighting would have "strands" (look carefully at the orange-haired elf in my pic ... you'll notice blue "strands" of hair - that's the ambient lighting).
The basic idea is that light, just like shadow, follows the shape on which it sits. I suppose the easiest way is to think of light like a liquid. Imagine how this "liquid" would sit ON TOP of your skin, your clothes etc.
I hope that makes sense. I don't pretend to be an expert or anything ... that's all just what goes through my head when I'm doing ambient lighting.
It would be awesome if you checked out my comic. It would be even cooler if you could give me some comments on it in my critique thread. Yeah, yeah, none too subtle am I. But I've only got 1 reply so far so ... yeah *sweatdrop* Perhaps I was asking for too much ... but really, any comments will do!
The basic idea is that light, just like shadow, follows the shape on which it sits. I suppose the easiest way is to think of light like a liquid. Imagine how this "liquid" would sit ON TOP of your skin, your clothes etc.
I hope that makes sense. I don't pretend to be an expert or anything ... that's all just what goes through my head when I'm doing ambient lighting.
It would be awesome if you checked out my comic. It would be even cooler if you could give me some comments on it in my critique thread. Yeah, yeah, none too subtle am I
levi:
http://forums.cgsociety.org/showthread.php?t=259468
http://seegmillerart.com/images/tutoria ... hair1.html
2 that really help me out X3; i still can't get it quite right. hair is ahrd to follow. no pun intended.
http://forums.cgsociety.org/showthread.php?t=259468
http://seegmillerart.com/images/tutoria ... hair1.html
2 that really help me out X3; i still can't get it quite right. hair is ahrd to follow. no pun intended.
lazy sput is lazy.
-
Christwriter
- Cartoon Hero
- Posts: 1915
- Joined: Fri Jan 30, 2004 11:56 am
*commits her first act of thread necromancy*
BUT I had to. 'Cause I did this:

It was much fun. The kilt-skirt-robe thing was fun to do, although the "dark" effect hides most of the shading I did.
CW
BUT I had to. 'Cause I did this:
It was much fun. The kilt-skirt-robe thing was fun to do, although the "dark" effect hides most of the shading I did.
CW
"Remember that the definition of an adventure is someone else having a hell of a hard time a thousand miles away."
--Abbykat, NaNoWriMo participant '04
Coloring tutorial It's a little like coloring boot camp. Without the boots.
<a href="http://blueskunk.spiderforest.com"> </a>
</a>
<a href="http://www.nanowrimo.org"> NaNoWriMo </a> --for anyone who has ever aspired to write a novel. Insanity is also a requirement.
--Abbykat, NaNoWriMo participant '04
Coloring tutorial It's a little like coloring boot camp. Without the boots.
<a href="http://blueskunk.spiderforest.com">
</a><a href="http://www.nanowrimo.org"> NaNoWriMo </a> --for anyone who has ever aspired to write a novel. Insanity is also a requirement.
-
Nightgaunt

- Regular Poster
- Posts: 346
- Joined: Mon Mar 22, 2004 4:08 pm
- Location: Washington State
- Contact:
bump
because this thread should never die
because this thread should never die
http://ruetheday.keenspace.com Banners? We don't need no stinkin' banners.
Nightgaunt : lol.
chris: Love the coloring job you did on Humbug's pic.
Here's random fanart if anyone wants something to color. It's from http://shiningknight.drowtales.com

In case it's not clear, the dragon is made out of pure metal.
chris: Love the coloring job you did on Humbug's pic.
Here's random fanart if anyone wants something to color. It's from http://shiningknight.drowtales.com
In case it's not clear, the dragon is made out of pure metal.
*EDIT: Uploaded completed art.*

Just thought I'd post this little something I was coloring last night. I was trying out a simple coloring style. I'ts only 3 tones with a very soft airbrush. It looks very pastel and glowy. ^^
I'm also practicing inking with the brush tool in Photoshop, it's hard work, but I love the clean crisp lines it gives.
Last edited by Humbug on Tue Oct 11, 2005 8:13 am, edited 1 time in total.
